Tuesday, February 26, 2013

How to Move!


I won’t say I’m an expert, but I have had a lot of practice.  I’m in the middle of my 15th move in 17 years.  I say the middle because while we are living in the house (and I hope not to move for a very, very long time), the basement isn’t finished so we are still “camping” and have not even nearly unpacked.  Since we have been married, my husband and I have lived in seven different states.  Most of our moves have been cross-country moves.  We have moved just the two of us, with one child, two children, three children and now four.  My in-laws have helped us pull the trailers and we have done it ourselves in multiple trips.  I definitely feel a little experienced when it comes to moving.

Throughout all of the moves I have developed a “system” with little tips and tricks that definitely make moving a lot less stressful for me.  I hope they work for you, too.

NOTE:  I have never had a moving company and I have never had to sell a house so I don’t have any tips for those two moving issues.  I’d love to hear your tips and tricks for those to situations.  Please post a comment.


1.  Get a notebook.  I have a favorite, pictured below.  It is small enough to carry around but big enough to write lots of notes on one page.  I prefer a Five Star notebook by Mead that I can get at Walmart.  It is 9 ½” x 6 ¾” and I usually buy the most obnoxious color they have at the store.  I don’t want it to blend in with other notebooks or stacks of stuff.  I want to know where it is at all times – obnoxious color helps.  There are two sections that are divided by a manila-colored pocket page.  I write all the stuff for “here” in the front (lists of things I need to do, doctor information, school information, lists of things I need to turn off, address changes that need to be made, etc.).  In the back half I write all the stuff for “there” (new school addresses, location of the church, new utility information, etc.).  The notebook is also a good place to write reservation information if you will be staying in hotels along the way.  I keep any papers I need to save in the pocket.  I also keep my favorite pen in the spiral part so I am never with a pen when I need to write something down.  It has gotten to the point that my husband, who often laughs at my crazy OCD-ness, asks me to write something down in my notebook so he won’t forget it during the move.  Seriously, it has saved my brain more than once.


The front of my notebook.  Yes, my two year old colored on it and no, it didn't change the usefulness of the notebook - haha!

 
Just a picture of the page where I listed all the phone numbers of the places I needed to change addresses - banks, cell phones, utility companies, etc.

All the old school information so the new school can request records.
A picture of my notes from my conversation with Dish Network.  I included the name and operator number of the lady who helped me.


2.  Get a colored tote/bin/box/storage container.  Most of our stuff is packed in totes (had too many mice in the trailers and too many flooded basements to trust cardboard boxes anymore).  We always buy the most inexpensive, silver totes that are made by Rubbermaid.  I have one tote that is colored (mine is green) and it is one that I keep by my bed while we are in “getting-ready” mode.  As I pack and come across things that I know we will need as soon as we arrive, I put them in the green tote.  This is where I keep the medical information, birth certificates, social security cards, etc.  I also put things that we will need during the trip in the tote, like books/magazines to read or movies and games I’ve purchased just for the trip.  I also put in all the extra pacifiers that I found when we moved when our children were babies.  It really helps when I can say, “Just put it in the green tote” or “It’s in the green tote”.  Because it is a different color I can also say, “Don’t pack the green tote until the end!  It needs to go in my van or at the back end of the trailer.”  I usually also have another tote that has house stuff we’ll need when we arrive, like sheets, paper plates, cups and disposable silverware, a pot and pan, towels, etc.  It makes it easier if I can just unload that the first night and know that we can live a day or two until we get everything else unloaded.


A picture of my green tote, surrounded by silver totes.


3.  Get two plastic folders.  I get the kind that have the string to wind around two circles to close it.  I use one for school papers that I will need to get from the school here and take to the school there (transcripts, etc).  The other folder has important papers – bills that will need to be paid, birth certificates, immunization records, social security cards, etc.  Sometimes I put the birth certificates/immunization records/ss cards for the kids into the school folder because the school will need them for registration.  I prefer for them to be a little see-through and different colors so I can tell them apart without opening them.  Put these in the green box and fill them as needed.


4.  Get your medical records from your current doctor and tell them that you are moving and they will be receiving a records request from your new doctor in your new town.  This is very important for my family since there are several of us who have health issues that require establishing with a doctor soon after we arrive in our new town.  It often takes weeks or months for medical records to be requested and sent to the new doctor.  By carrying the medical records with us I can establish care and get the medication needed without having to wait for the requested records to be sent.  Because we’ve had testing done to get the correct diagnosis and don’t want to repeat the testing, I always take the records with me to our first appointments so the doctors can see the diagnosis and what we’ve done to get to that diagnosis.  This is especially important when I take my oldest son in because we went through many years of mis-diagnosis before we found out the real problem.  In this case most of our doctors have been amazed at the correct diagnosis because it is unusual.  I have all of the records organized in a binder with dividers for each member of the family.  Most recent records on top.


5.  Get a receipts envelope.  If you are going to be able to claim your move on your taxes or if you are going to be reimbursed for the move by an employer, get an envelope for each car traveling to the new location.  I like a 9x6 manila envelope.  It’s simple and I can write all over it.  I usually keep a pen inside the envelope so I can write on the receipts if I need to.  Remember that some types of receipts fade after time.  You can always write down the amount next to the printed amount if you think it’s going to fade.  When the move is over, close the envelope with the clasp, label it “Move 2012”  and put it with your tax stuff for future filing.


6.  Label all boxes on top and on the side.  Some people do different colored labels/papers/pens for each room in the house.  I usually use a different color pen each time I move and just cross out the previous move information on the box.  It works better for me.  I also write directly on my plastic totes so I don’t have to fuss with tape and 3x5 cards.  Just find what works for you but make sure you label both the top and side of the box and avoid vague labels like “miscellaneous”.  (Funny note:  One move when my inlaws were helping us pack, my mother-in-law labeled the boxes.  She wrote little vignettes that were so fun to read later.  She wrote things like, “The cute stuff that you kept in the kitchen hutch but were such a pain to dust.”

7.  Get some Ziploc bags.  They are my favorite things in the entire world!  I buy them in all sizes from snack size to 2-gallon size.  I love the large ones to keep things together like all the cell phone cords, camera cord, etc.  Then they don’t get lost when I put them in my green tote.


I think that’s about it, but if I come up with some more I’m sure I’ll add it all later.  Please comment with any tips and tricks you find helpful.  I’ve said that we aren’t moving again for a long, long time but I’ve said that before... several times …


A picture of my friend, Jen's, cute daughter and Jen's interpretation of the moving tips.  She's using the accordion file for her important papers and a small receipt envelope for her receipts.  Good luck on your move, Jen!

Wednesday, December 5, 2012

Let it Snow... California Style!

I grew up in Sacramento, California.  Until I went to college in Utah, my idea of a white Christmas was when it was foggy on Christmas morning.  My parents and four of my siblings still live in California and don't ever get a white Christmas... Until now!
My sister and my five year old niece, Annelise (mostly Annelise), made a snowy scene on their window.  They took plastic wrap and stuck it to the window.  Then Annelise glued cotton balls to the plastic wrap to make it look like it was snowing outside.  So dang cute!!!
Thanks for sharing this great idea with me, Robyn!

Tuesday, September 18, 2012

Scrappy Quilted Potholders

Christmas is coming... FAST. I love to make gifts and I love it even more if the gifts I make are inexpensive or even free.  I love to make the quilted potholders out of scraps from my scrap bag.  Even the "innards" are scraps.  (I apologize, in advance, for the wonky pink color that shows up in some of the pictures.  My camera was acting up.  All the fabric for this tutorial is either white, black or gray.)

Materials Needed: 


 1.  Scraps in the color scheme of your choice.  (My husband HATES it when I buy "scraps".  You know how it is, though... sometimes you just have to fill in a hole in your stash.)

2.  Heavier fabric for the insides of the potholders.  I love to use old towels, jeans, fabric that I no longer love... just about anything will work.

3.  A piece of backing fabric (at least a 12x12" square)

:
4.  Muslin or cotton broadcloth square (at least 9x9" square)


Directions:
1.  Choose two pieces of fabric to start.  Cut pieces that are smaller than your 9x9" piece of muslin.

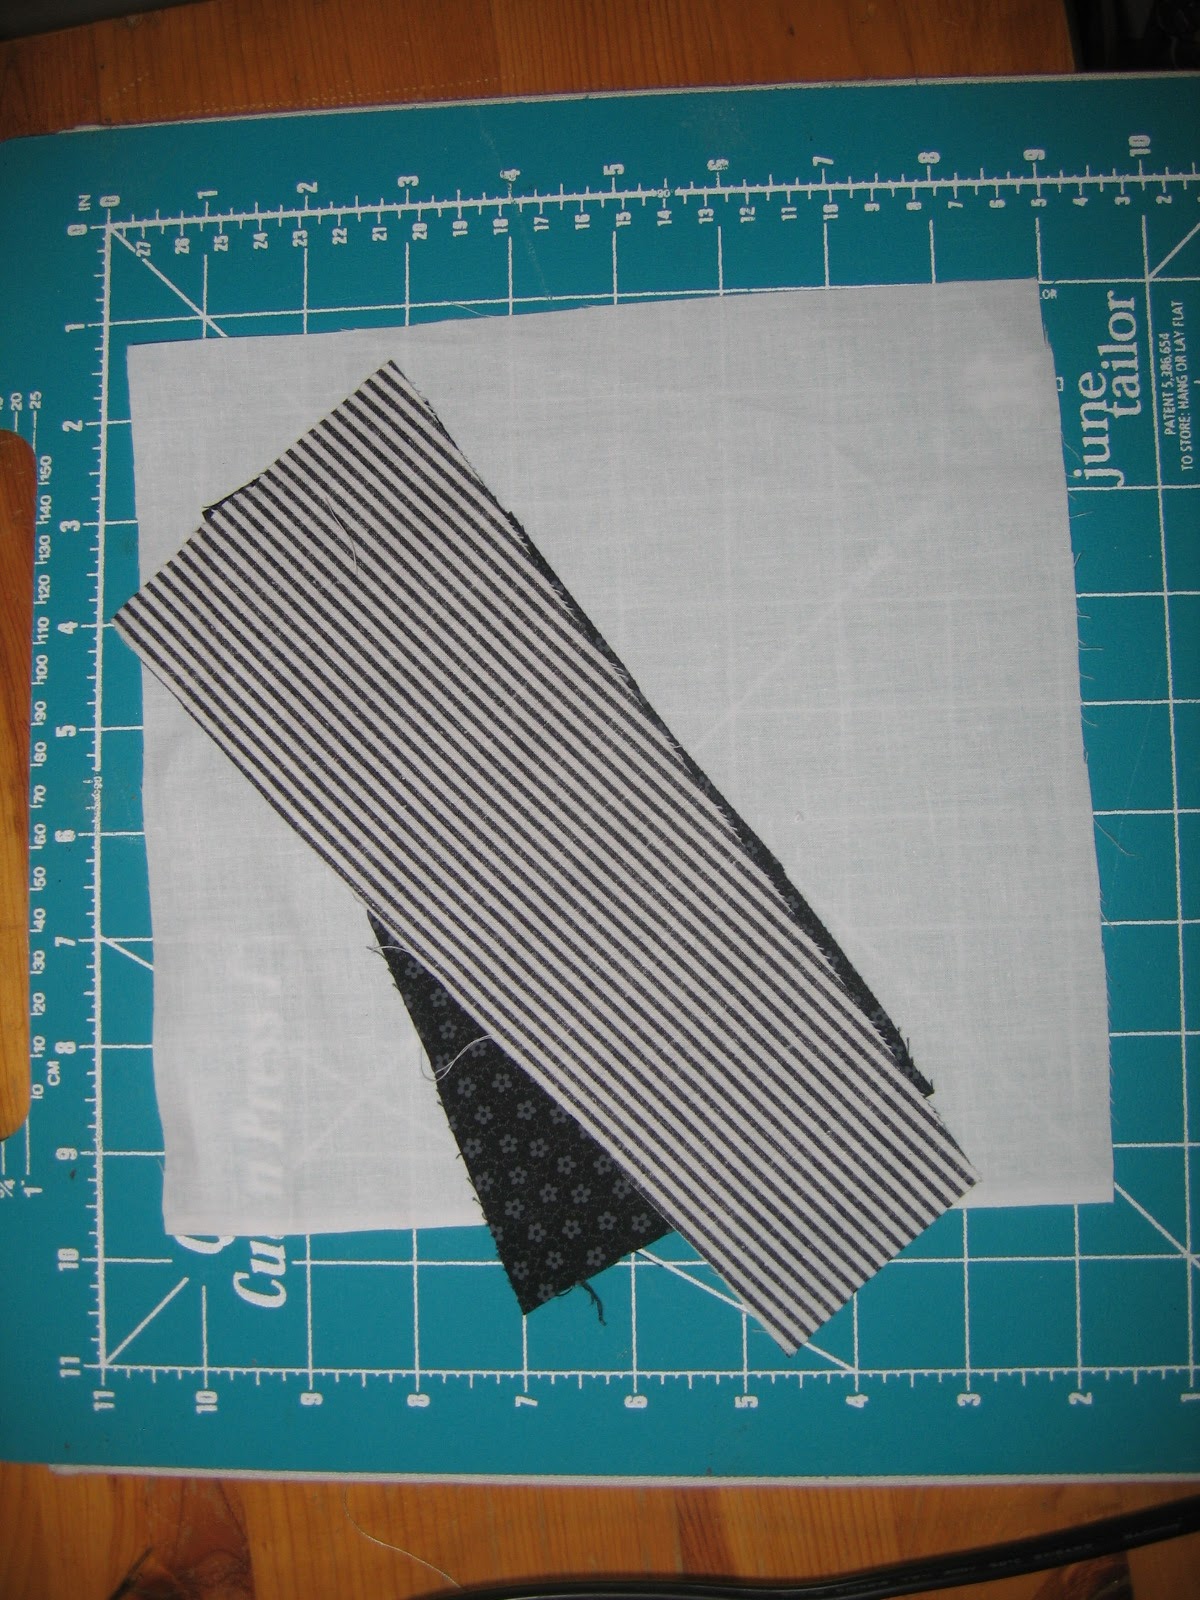
2.  Lay the two scraps , right (pretty) sides together, on top of the muslin.  Make sure that one edge of each of the scraps match.  Sew down the matched edges.  I usually use a 1/4" seam.

3.  Open up the scraps and press the seam down.

4.  Choose another scrap.  Lay it face down on top the other two scraps, making sure that you don't make it look like parallel stripes.  Sew down the edge of the newest scrap.

5.  Open up the new scrap and press down the seam.

6.  If you can see back fabric through the new scrap, like with this white piece, trim the back scrap.
7.  Choose a fourth scrap.  I usually lay it down where I want it (above) and then fold it over so the right sides are together (bottom).

8.  Sew down the side of the new scrap.

9.  Open the newest scrap and press.

10.  Continue choosing scraps, sewing, pressing, trimming around the muslin, .... until you have covered the muslin and you like the look.

11.  Add another piece, press open and trim around the muslin fabric.

12.  Trim to match the piece of muslin.

13.  One more corner to cover ...

14.  ....open, press ...

15.  ... trim ...

15.  Make sure all the muslin fabric is covered by scraps.

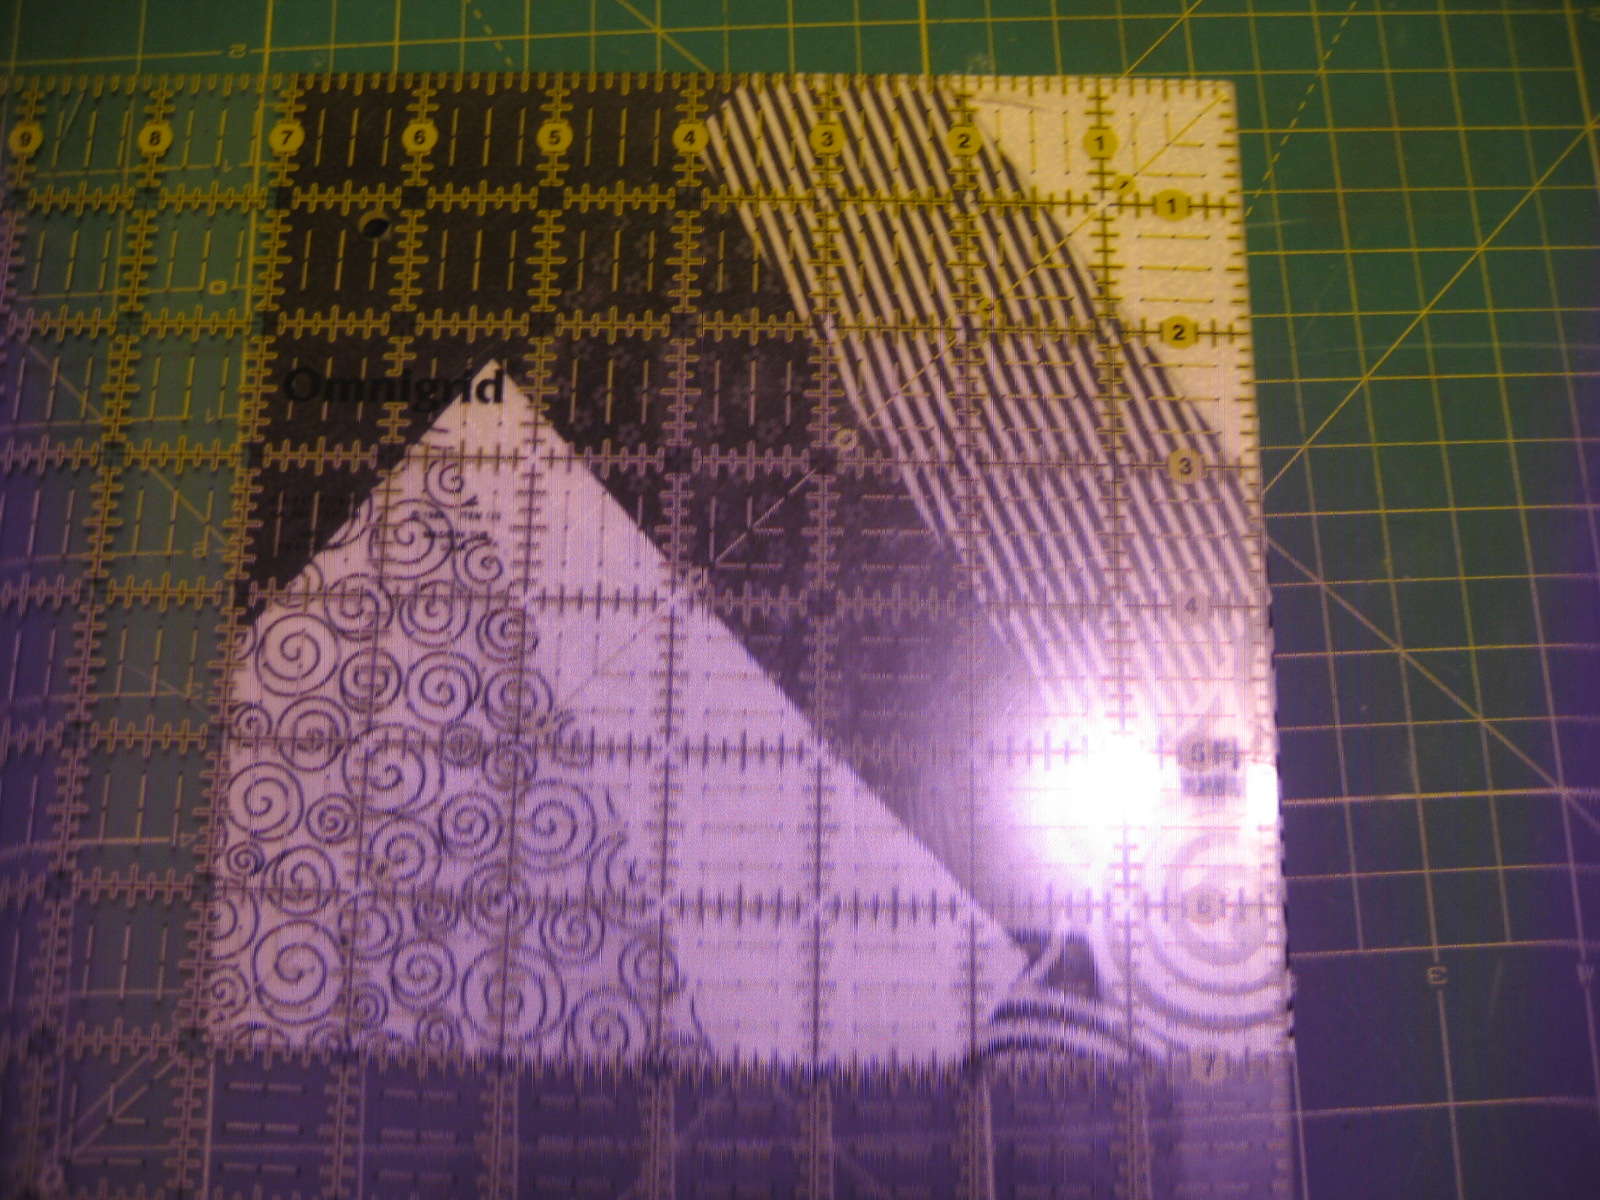
16.  Square up the block.  I usually use my 12 1/2" quilting square ruler to square my block to 8x8" square.


17.  The finished block.

18.  Layer the insides.  I usually layer muslin, towel, muslin, towel, top piece.  Pin all the layers together, making sure to keep the seams free of pins.

19.  ABOVE:  Sew along the seams through all the layers.  It is also called "stitch in the ditch".  Remove the pins and trim threads and fabric (if necessary).


20.  BELOW:  Lay potholder on top of backing piece (12x12" square).  Center as best you can.  Roll one side so the raw edge is "inside"  (think "rolled hem").  Put in a pin perpendicular to the potholder, catching the potholder int he pin.

Closeup (blurry) picture of pinning one side.  I usually put a pin in the center and one about an inch from each corner.

21.  Pin the opposite side exactly like you pinned the first side.

22. Pin the third and fourth sides.

23.  ALERT:  This is the trickiest part of the whole project.  Clip each corner.  If you clip too much off, you'll have a hard time making a faux mitered corner.  Remember, you can always make the piece shorter but it's hard to make the piece longer.

Close up of the corner clipping.

Just a picture of the corner pieces clipped off.

24.  Fold one side of the corner "in" to the corner.

25.  Fold the other side of the corner over, hiding the raw edge.  Kind of work it so it forms a line like a mitered corner.

26.  Pin the corner in place and do the same to the other three corners.  If you want to put hanging loops on the potholders, now's the time to do it.  Pin it in one corner of the potholder and sew it in when you do the next step.


27. Sew around the edge/binding. I usually back stitch the corners to make sure they hold.


Some examples of ones I've made.  The upper left set was for the story time librarian, made from bookworm fabric.  The upper right set was made for a teacher...frogs were the school mascot.  The bottom pair was made for a teacher whose favorite color was blue.

This pair is my one that I made to match my cow-themed kitchen.  You can see the hanging loops I put on the corner.  They usually hang from a magnet from the range hood and have been used a lot in the last seven years.  I'm ready for a new pair but want to wait until we are in our new house and I figure out what colors I want in the kitchen.  Right now I'm leaning towards a pale green and coral color but we'll see...


I love to make these from the leftover apron fabric and give them as gifts.

Happy sewing!  Please let me know if any of this is unclear and I'll try to write clearer instructions.

Tuesday, August 28, 2012

First Timer: Mammograms

Hi. I'm 40 and I'm a first timer.

It didn't take long for my primary care doctor to call me in for that "you just turned 40" physical. Not knowing what I was really in for, I arrived at her office on Friday, a few minutes before my scheduled appointment and filled out the necessary paperwork. When the nurse took me back to the examining room she rattled off the list of procedures I was going to have. I knew for sure I would have the Pap Smear and breast exam but I was taken by surprise when the nurse told me I needed a mammogram, too. I thought the first mammogram had to happen at 50, not 40. Oh well, I scheduled the mammogram for Monday morning. I was a little nervous, not knowing what to expect.  I'd only heard negative things about mammograms so I was prepared for the worst...

After I checked in at the hospital's front desk and filled out the proper paperwork, this cute radiology tech took me back.  Her name is April.
April introduced me to her new mammography machine... it's digital, just like the bigger hospitals.  She handed me a gown and asked that I put it on with the opening to the front.  (Good thing  I left my dignity at the front door.)  When April came back in she positioned me in front of the machine and took four x-rays, two on each side... one straight on and the other on the side.  I was prepared for some serious squishing but it was nowhere near as bad as I had heard.  Uncomfortable, yes, but not overly painful.  It's not like going to the dentist for a filling or anything, just uncomfortable.  The whole while April kept up pleasant chatter, answered my random questions about silicone implants and listened to my stories.  It was over without  much fanfare.


Two things I will remember for next time...
1)  Shave my underarms.  I had done it just a few days before so I wasn't a hairy gorilla, but I wish I would have remembered that morning.
2)  Don't wear deodorant.  I had asked the lady who helped me schedule my appointment but she said deodorant was fine, but don't wear any lotions or perfumes on the chest area.  April had me wipe off my deodorant before the mammogram.

Really, no one is excited about getting a mammogram.  It's like all those other annual tests we have to have that seem semi-violating.  Suck it up, kiss the frog, whatever you want to say to get you through it, but schedule a mammogram.  It's not that bad, really.  And don't forget to pick your dignity up on your way out.

(This post is dedicated to my three friends who were diagnosed with breast cancer this past spring... SS, age 34, opted to have a double mastectomy;  NW, age 50-something, opted to have a lumpectomy; and Sister Smith, age 60-something, who is still going through chemo.  You are all inspirations of courage and being positive through trials.  Hugs and prayers for you all.)

Wednesday, March 7, 2012

JOT Journal

So, I'm in therapy. Yep, that's it ... I've said it. I've laid it all on the table. I see a therapist every Wednesday at 2 p.m. She's fabulous and she's helped me a lot in the past five or six weeks.

I started going because, in the past 10 months or so, I have developed some unhealthy eating habits. I won't go into detail but I will say this: I'm stressed and my way of de-stressing is some unhealthy eating habits. I'm working on those. We've also discovered that I have Obsessive Compulsive Personality Disorder (OCPD). It's like OCD but a little less (look it up on wikipedia and read the part about signs and symptoms and obsession, but ignore the part about house cleanliness - that doesn't apply to me - I wish it did, but it doesn't). It means that I have certain ways I do things. I like the towels folded a special way. I am a big rule follower and have little tolerance for people who don't follow the rules. Many things are black or white to me. I have control issues, that's for sure. That's not why I'm writing this post, though....

I'm writing this post because of something Melinda and I discussed today. She said that I beat myself up and that causes me stress which makes me do my unhealthy eating habits in order to destress. Duh, of course I beat myself up about stuff. Don't we all do that? Isn't that just human nature? Isn't that a "mom" thing? I'm too fat, I'm too gray, I'm too mean, I was too lazy to put the grocery cart back into the cart return place, I wish I hadn't said that, I wish I was a better pianist, Mac-n-cheese for dinner again?... The list goes on and on. For each of us, I'm sure, the list is never-ending. So, what should I/we do about it? Well.... Melinda had me read an article by Dr. Rick Hanson called, "Don't Beat Yourself Up". (Dr. Hanson writes a blog of JOTs - Just One Thing.) While I don't subscribe to everything in the article, I do agree with two things he said. First, when you find a fault in yourself, give yourself an encouraging talk about it (not to encourage yourself to do it again, but encourage yourself to take appropriate action). Second, after your encouraging self-talk about your fault, name three virtues or good points about yourself. I've decided that I need to take this one step further for myself... I need to write down "Just One Thing" (JOT) that is positive about myself. I guess you could say that I'm going to start a JOT Journal of sorts.

Thanks for reading and happy "jot"ting.

(P.S. If you'd like to read his article - here's the link... http://www.rickhanson.net/inner-peace/dont-beat-yourself-up)

Tuesday, February 21, 2012

Picking Up a Penny and Hope

For several weeks I've been nervous about some pains I've been having. I finally went to the doctor on Friday. She is a fabulous doctor whom I both respect and trust. She was stumped by these pains - they could either be caused by something serious or just be because I'm getting older. She ordered a test to be done at the hospital to rule out the more serious reasons. Needless to say, I was very anxious over the long weekend and arrived at the hospital for the test shortly after 8:00 this morning.

On my way into the hospital I found a quarter on the ground. I remembered a story that I had heard once...

A man and his wife were once invited out to dinner by the man's employer. This was going to be a very important affair for the couple because they felt honored about the invitation. This particular employer was enormously wealthy. His financial status soared far above that of the employee and his wife. In fact, the couple became more nervous about the occasion as it approached with each passing day.

When the day of the dinner-date finally arrived the employer met the couple near the entrance to one of the most exclusive restaurants in the area. Following a formal greeting, the three of them proceeded toward the door with the wealthy employer leading the way. After a few steps the employer stopped in his tracks and appeared to be quietly staring at the ground in front of him.

After nearly bumping into the man, the couple stopped short, wondering what may be wrong. After a few seconds the employer bent over, picking up a single penny which lay on the sidewalk. He brushed it off, placed it into his pocket, and continued toward the door. The group was quickly seated and their order was taken.

As they waited for the food to be served, and, in an attempt to relieve an obviously tense atmosphere, the wife of the employee jokingly made the following comment: "I noticed that you didn't walk past that penny on the ground outside. Is that how you have become so wealthy?"

The employer smiled kindly, reached into his pocket, and brought forth the redeemed penny, laying it on the table-top.

"Read what it says." He asked.

The couple leaned forward, reaching for the penny, and pulled it closer.

"In God We Trust." Said the wife.

Then the employer explained that he didn't become wealthy by picking up pennies. He picked up pennies, and any other lost coins because of those words. He explained that God's name is holy. (Remember the words to The Lord's Prayer?) If we shouldn't use it in vain we should also make sure that it is not walked upon by passers-by. But, he also explained another reason for pausing a short time before retrieving the penny from the ground.

"It is as if God has dropped a message into my pathway and He wants to remind me to keep my trust in Him." He told how he always said a short prayer of thanks, as a reply to God's loving message. The employer went on to explain, as they enjoyed the dinner and the evening together, that a single penny can become worth more than gold or silver in strengthening our relationship with our Heavily Father.

Of course, I picked up the quarter and looked at it. Needless to say, I read the words on the front "In God We Trust" and was comforted by those words because that is where my trust is and needs to be. So far, the preliminary results look good (or rather it looks like I just may be getting old - haha). But, even if the more detailed results come back pointing to scary things, I know that I can trust in God for my comfort and strength and for that of my family.

Thanks for reading.