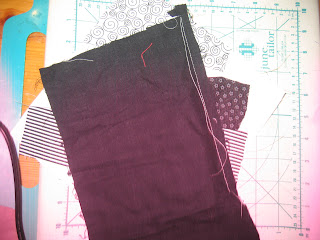
Materials Needed:
1. Scraps in the color scheme of your choice. (My husband HATES it
when I buy "scraps". You know how it is, though... sometimes you just
have to fill in a hole in your stash.)
2. Heavier fabric for the insides of the
potholders. I love to use old towels, jeans, fabric that I no longer
love... just about anything will work.
3. A piece of backing fabric (at least a 12x12" square)
4. Muslin or cotton broadcloth square (at least 9x9" square)
Directions:
1. Choose two pieces of fabric to start. Cut pieces that are smaller than your 9x9" piece of muslin.
2. Lay the two scraps , right (pretty) sides together, on top of the
muslin. Make sure that one edge of each of the scraps match. Sew down
the matched edges. I usually use a 1/4" seam.
3. Open up the scraps and press the seam down.
4. Choose another scrap. Lay it face down on top the other two scraps,
making sure that you don't make it look like parallel stripes. Sew
down the edge of the newest scrap.
5. Open up the new scrap and press down the seam.
6. If you can see back fabric through the new scrap, like with this white piece, trim the back scrap.
7. Choose a fourth scrap. I usually lay it down where I want it
(above) and then fold it over so the right sides are together (bottom).
8. Sew down the side of the new scrap.
9. Open the newest scrap and press.
10. Continue choosing scraps, sewing, pressing, trimming around the
muslin, .... until you have covered the muslin and you like the look.
11. Add another piece, press open and trim around the muslin fabric.
12. Trim to match the piece of muslin.
13. One more corner to cover ...
14. ....open, press ...
15. ... trim ...
15. Make sure all the muslin fabric is covered by scraps.
16. Square up the block. I usually use my 12 1/2" quilting square ruler to square my block to 8x8" square.
17. The finished block.
18. Layer the insides. I usually layer muslin, towel, muslin, towel,
top piece. Pin all the layers together, making sure to keep the seams
free of pins.
19. ABOVE: Sew along the seams through all the layers. It is also called "stitch in the ditch". Remove the pins and trim threads and fabric (if necessary).
20. BELOW: Lay potholder on top of backing piece (12x12" square). Center as
best you can. Roll one side so the raw edge is "inside" (think "rolled hem"). Put in a pin
perpendicular to the potholder, catching the potholder int he pin.
Closeup (blurry) picture of pinning one side. I usually put a pin in the center and one about an inch from each corner.
21. Pin the opposite side exactly like you pinned the first side.
22. Pin the third and fourth sides.
23. ALERT: This is the trickiest part of the whole project. Clip each
corner. If you clip too much off, you'll have a hard time making a
faux mitered corner. Remember, you can always make the piece shorter
but it's hard to make the piece longer.
Close up of the corner clipping.
Just a picture of the corner pieces clipped off.
24. Fold one side of the corner "in" to the corner.
25. Fold the other side of the corner over, hiding the raw edge. Kind of work it so it forms a line like a mitered corner.
26. Pin the corner in place and do the same to the other three
corners. If you want to put hanging loops on the potholders, now's the
time to do it. Pin it in one corner of the potholder and sew it in when
you do the next step.
Some examples of ones I've made. The upper left set was for the story time librarian, made from bookworm fabric. The upper right set was made for a teacher...frogs were the school mascot. The bottom pair was made for a teacher whose favorite color was blue.
This pair is my one that I made to match my cow-themed kitchen. You can see the hanging loops I put on the corner. They usually hang from a magnet from the range hood and have been used a lot in the last seven years. I'm ready for a new pair but want to wait until we are in our new house and I figure out what colors I want in the kitchen. Right now I'm leaning towards a pale green and coral color but we'll see...
I love to make these from the leftover apron fabric and give them as gifts.
Happy sewing! Please let me know if any of this is unclear and I'll try to write clearer instructions.


.JPG)


Just lovely, Christine! Clear and easy directions.
ReplyDeleteI'm getting ready to post my potholders, too. Been doing the fun part first. Now...I have 8 pairs to bind (not my favorite part..).